
via Picture Framing Magazine by Marty Horowitz
When you create the right patina, your clients will ask if that period frame is a replication—or an original.
The next day I took my whole class to the museum. Not only did we see the Modigliani frames, but we were also in awe of the permanent collection at the AGO Museum, which is quite a walk through history. I always tell everyone that going to a museum is the very best way to learn about picture frames.
While all the Modigliani paintings were great, the frames were to die for! Suffice it to say all my old framemaking friends were there in all their glory and different styles. There were Carlo Maratta and Sansovino frames, tabernacles and Venetian frames, and cassettas of all kinds. For all of you who don’t know what a cassetta frame is, it’s any frame that has a flat panel between a raised sight edge and a raised back edge. There was this one great Modigliani portrait of a woman in an amazing cassetta frame with fabulous patina. I knew I had to reproduce it. So I took my trusty napkin out of my pocket, borrowed a pen, and drew the face of the frame and the profile. When I got back to Santa Fe, I set out to reproduce this frame and that great patina.
Replicating Patina
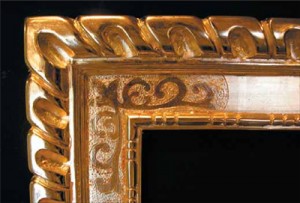
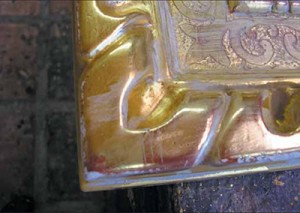
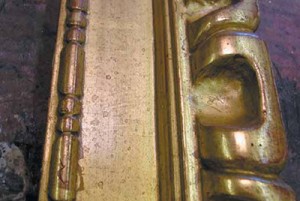
All antique picture frames were gilded as perfectly as the photo on the bottom left of page 76. This is the raw gold before it has taken on any patina—garish, strong, and fabulous. There was no patina put on the period frames. They were carved and gilded to help illuminate paintings in candlelit interiors. Patina just grows over the years. Today, when a period frame is replicated, it has to look like the patina happened naturally, not that it’s been added. Patina develops because of where a frame was born and where it lives. If a frame was carved and gilded in Italy, it looks different from a frame carved and gilded in France. That’s because in Italy, there’s salt air from the Mediterranean. It’s kind of mountainous, and the acid rain that falls is of a different nature than the acid rain that falls in France. In France, it’s all fresh water and meadows and a different environment. So a French frame has a different color than an Italian frame, and a different color than a Spanish or an American frame. The Italian color is that beautiful translucent green.
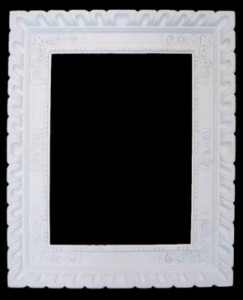
At this point, I must tell you that replicating a specific patina means you must start from the wood and work outward to the final finish. The idea that the patina can be put on the frame after the gilding is done isn’t what this process is all about. It’s got to start with the wood and be built. It’s like a fine oil painting. Without the proper foundation, a painting won’t come out the way the artist wants. So you get the wood, modify the profile to what you want, go through the gilding process, and then you add the patina.
Creating The Gilded Frame
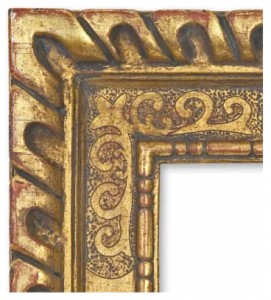
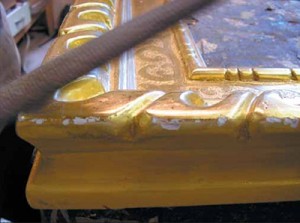
In this case, I knew I could modify a profile I had in stock. The next step was to reproduce the carve on the outside edge. This is a fan or ray design that starts in the center of the leg and progressively sort of falls into the corner carve (how wonderfully romantic!). The simple dot-and-dash design on the sight edge was then carved, starting in the corners and shrinking or stretching the design to fit the space so it always looked complete. After gessoing, the design was incised into the corners and centers of the panel, and the punch work was also done around that design.
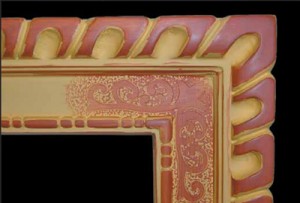
Now it was time for the bole or clay coats. This is where the color of the patina begins. Normally I would use a straight red or yellow clay. But the yellow base coat on this frame was a little warmer than usual, and the highlight color was a little more orange than usual. These colors were the ones used in the original frame. The red-orange clay was only glazed over the tops of the carving and the designs in the panel. If the clay colors varied from what I saw in the museum, then there was no way to achieve the correct patina.
After gilding, it was time for burnishing. All frames should be done with sections burnished and matte in alternating fashion. If you burnish the front rail of a frame, for example, then the panel should be matte. The next rail should be burnished, the next part matte, and so on. For this frame, the inner rail, the incised design, and the tops of the outer carve were burnished. This corresponded to the areas covered with the red clay. The gilding covering the yellow clay was left matte.
Aging The Finish
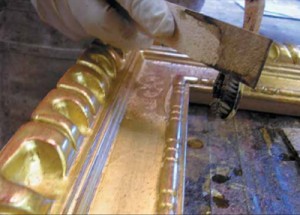
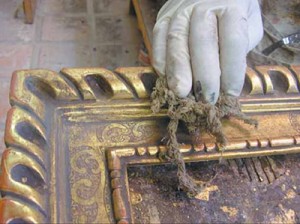
After burnishing, it was time to proceed to distressing and abrading the surface of the gold. I rubbed the gold all the way down to the gesso in certain areas. There are many ways to rub or abrade the frame, to bring the color of the bole up from under the gold. In this case, I used pumice and alcohol to create a slurry. The pumice is very soft but still abrasive enough to take away some of the leaf while allowing control over how deep you go into the surface. At the edges of this frame, I wanted to go down to the gesso to show the age.
There are other ways to rub frames. You can also use rottenstone and alcohol. One of the most common is to rub it lightly with steel wool, but I don’t like that because it’s a little too aggressive. My choice was also part of creating an Italian patina. For instance, when I rub a contemporary frame, I’ll use lacquer thinner and whiting for soft, gentle abrasion. That would not be strong enough for this frame. The distressing was done with the typical tools: chains, ice
picks, and rasps as well as high-heeled shoes and whips (not really—but you get the point). For an American patina, I would use a very light touch with the tools. Because this is Italian and much older, I could be a lot more aggressive. These tools are used to form the dents and scratches and chips that make the age of the frame appear real. I do swing the chain gently, however. Ice picks are used to simulate worm holes, while rasps are used to chip through the gold and clay down to the gesso and wood beneath.
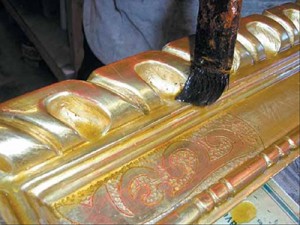
The color of the gold on the original was very odd, which was what made it so unique. It was a wonderful translucent green. To get this color, I used clear and amber shellac and a pinch of raw umber dry artist’s pigment. This is a matter of the finisher’s taste. In this case, I was replicating the tone on the original frame. After two coats of this mix, I knew I had nailed it. Still, it needed more translucence. I used a technique of a great old gilder

by the name of Wayne Bettle. Wayne was one of those freelance gilders who bounced around Manhattan through the 50s, 60s, and 70s, working in some of the biggest gilding shops in the city. He’s the person who taught me how to gild those big Louis XV sweeps with the intricately carved, ornate corners. Aghh! Well, that’s another story. His trick that I used on this frame was to apply multiple layers of shellac spatter.

Not fly specks but spatter, which gives you many different-sized spots of shellac on many different levels. To apply spatter, you draw a stick across a stiff brush—or vice versa (an old toothbrush works well). Your distance from the surface affects how big or small the spatter spots are. This technique gives the surface of the gold that aged, translucent look of many years gone by. The light sort of passes through and bounces off the different layers of the surface.
The next step was to apply a casein paint wash. This was made from a mix of raw umber, a touch of raw sienna, and a touch of white casein paint. Then came a coat of black wax, applied very sparingly with a cloth and buffed. Finally, the frame was dusted. (The dust at
Goldleaf Framemakers replicates cigarette ash because it’s always plentiful here!) All this creates a cloud on the surface that can be manipulated by removing, in some areas, what was just applied. The overall effect is evident in the finished frame. Remember, no one should ever see that you put the patina on the frame. You put it on, and then you take it off. When you look at a frame, it should make your client ask, “Is this a replication or the real thing?”
I’ve tried to include some details of applying patina, but as I said, patina is an art. If you’d like to find out more about patina or gilding in general, my book Introduction to Water Gilding, published by PFM, details these steps more thoroughly, including things like recipes for the casein wash. And don’t forget: the best way to learn what real patina looks like is go to art openings and every museum you can. You never know what you’ll find.